
Last Updated: November 17, 2026
Quick Summary
Practice hazard perception by running a repeatable five-step routine each session: set one goal, do a pre-drive scan check, drive with a running commentary, review late reactions while parked, and log what to try next. Short, frequent sessions and structured clip review build anticipation faster than random drives.
- Name what you see and expect out loud to turn passive glances into active predictions.
- Move through five stages from quiet residential streets to mixed, unfamiliar routes.
- After each clip, pause at your click and at the moment the hazard actually developed.
- Poor clicks usually fall into four patterns: too early, too late, wrong hazard, or over-clicking.
- Click once when the situation changes, and again only if it changes again.
Table of Contents
- Why Hazard Perception Practice Feels Harder Than It Looks
- Hazard Perception Examples You Will Meet on Real Roads
- A Step-by-Step Routine for Hazard Perception Practice with a Supervisor
- Hazard Perception Test Practice: Clips, Clicking, and Reviewing Mistakes
- How to Pass Hazard Perception Test Sections Without Over-Clicking
- Building Observation Skills Between Practice Sessions
- Start Your Guided Hazard Perception Practice
- Frequently Asked Questions
Why Hazard Perception Practice Feels Harder Than It Looks
Hazard perception is the skill of reading the road ahead and spotting a risky situation before it becomes a problem. Most learners can see a hazard once it is obvious. Very few can predict one early, and that gap is where test scores and real driving confidence both live.
A common frustration for learners is watching a clip, clicking, and then finding out the click came too late. The problem is often not eyesight. It is anticipation.
The Difference Between Seeing and Anticipating
Seeing is passive. A pedestrian standing at a curb is visible to anyone looking forward.
Anticipating is active. An anticipating driver asks a better question: what is that pedestrian likely to do next? A person turned toward the road, standing near a crosswalk, often steps off.
That shift, from watching to predicting, is the whole skill. It also explains why hazard perception practice feels harder than steering or parking. Steering is mechanical.
Hazard Perception Examples You Will Meet on Real Roads
Hazard perception examples fall into two groups: potential hazards and developing hazards. A potential hazard is something that could become a problem. A developing hazard is one that is actively unfolding and will force you to change speed or direction (Theory test: cars: Hazard perception test).
A ball rolling into the street is a potential hazard. A child running after it is a developing one. The scoring in most official tests rewards spotting the developing stage early.
Hazards by Road Environment
Different roads produce different hazards, and practicing by environment builds pattern recognition fast:
- Suburban streets: parked cars hiding children, driveways with reversing vehicles, dogs off leash
- Junctions: vehicles creeping past stop lines, drivers misjudging gaps, cyclists filtering up the side
- Roundabouts: cars changing lanes mid-circle, motorcycles in blind spots, late brakers
One habit ties all of these together: scan far ahead, then work backward toward your own bumper. What most guides miss is that the far scan matters more than the near one. By the time a hazard is close, your options are gone.
A Step-by-Step Routine for Hazard Perception Practice with a Supervisor
Hazard perception practice with a supervisor works best as a repeatable routine, not a random drive. Most guides hand you a list of tips and stop there.
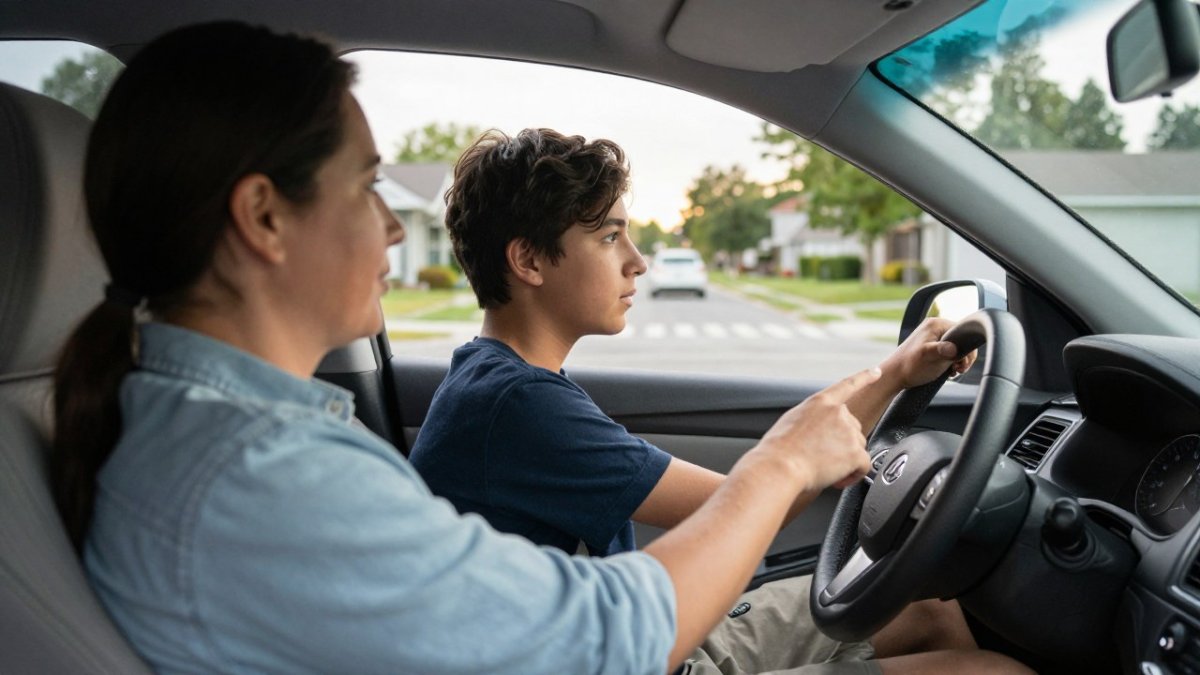
- Set one goal before you move. Pick a single focus, such as junction scanning, following distance, or reading parked cars. One goal per session beats five, because a learner can only build one habit at a time.
- Do the pre-drive scan check. Walk the area around the car, then settle in and name what you can see far ahead before starting the engine.
- Drive with a running commentary. The learner says out loud what they see and what they expect: "Blue car at the driveway, might reverse." This is the single fastest way to build anticipation, because it forces the learner to convert a passive glance into an active prediction.
- Pause and review while parked. After the drive, stop somewhere safe and legal, engine off, and talk through two moments where the learner reacted late and why.
- Log it. Note the goal, what happened, and one thing to try next time.
How Long and How Often to Practice
Short, frequent sessions are often more useful than long ones, since repetition of the same scanning habit matters more than total time behind the wheel. The point is not volume.
Watch out: if a learner is tired, frustrated, or losing concentration, end the session while parked rather than pushing through. A late reaction caused by fatigue teaches the wrong habit.
A Progressive Progression, Not Random Drives
Random drives feel productive but rarely build skill in order. A progressive routine moves from simple to complex so each session builds on the last:
- Stage 1, Quiet residential streets. Low traffic, low speed, plenty of parked cars and driveways. The goal is naming potential hazards out loud.
- Stage 2, Suburban arterials and junctions. More traffic, more decision points. The goal is spotting developing hazards at junctions and predicting what other drivers will do.
- Stage 3, Busier intersections and lane changes. The goal is scanning far ahead and checking mirrors before a hazard forces a reaction.
Repeat a stage until the learner can narrate hazards without prompting. Only then move on. This is the same logic behind structured behind-the-wheel lessons: each lesson has a focus, and progress is demonstrated, not assumed.
The Pre-Drive Scan Check
The pre-drive scan check takes under a minute and sets the tone. Before pulling out, the learner names three things: the nearest hazard, the farthest thing they can see, and one escape route if traffic changes.
If you want ready-made drills to slot into this routine, our guide to 10 driving practice drills for new drivers gives you concrete exercises for each session.
Here is the five-step routine to run every supervised session, in order.
| Step | What to do |
|---|---|
| 1 | Set one goal before you move |
| 2 | Do the pre-drive scan check |
| 3 | Drive with a running commentary |
| 4 | Pause and review while parked |
| 5 | Log the goal, what happened, one thing to try |
Hazard Perception Test Practice: Clips, Clicking, and Reviewing Mistakes
Hazard perception test practice uses video or CGI clips where you click when you spot a developing hazard. The format varies by jurisdiction, so check your local licensing authority for the exact rules where you live. Third-party practice clips can help build the skill, but they are not official tests and may score differently.
Official Rules vs. Third-Party Practice Clips
One source of confusion is that practice materials differ. An official test is set by a licensing authority and scored under that authority's rules.
Before you practice, find out what your local licensing authority actually requires. In the U.S., that is typically your state DMV or MVA, or the equivalent agency where you live. Ask three questions: Is a hazard perception component part of the test?
A Structured Post-Clip Review Process
Reviewing mistakes is where most learners leave value on the table. Reviewing clips with structure tends to build skill more effectively than clicking through many clips without review. Use the same four-step review after every clip:
- Replay the clip and pause at the moment you clicked. Note what was on screen.
- Replay again and pause at the moment the hazard actually started developing. Compare the two moments.
- Name the gap. Was it early, late, or the wrong hazard?
- Write one sentence about what you would watch for next time.
That written sentence is the part most learners skip, and it is the part that transfers to the next clip.
Diagnosing Why a Click Scored Poorly
When a click scores poorly, the cause usually falls into one of four patterns:
- Too early. You clicked on a potential hazard that never developed. This is common with parked cars, pedestrians waiting at a curb, and vehicles at junctions that never move.
- Too late. You saw the hazard, but only after it had already forced a reaction. This is the most common pattern for new learners, and it usually means the eyes were too close to the bumper.
- Wrong hazard. You tracked a distraction, such as a billboard, a passing motorcycle, or a dog on the sidewalk, instead of the real risk.
Write the pattern down next to the clip. After a handful of clips, a learner usually sees the same pattern repeating, and that is the habit to target in the next supervised drive.
Building a Clip Practice Session
A clip practice session works best with a fixed shape:
- Warm-up: two or three easy clips to get the eyes moving.
- Focus block: five to eight clips on one hazard type, such as junctions or pedestrians.
- Review block: replay the two clips that scored worst and run the four-step review.
A focused block of clips followed by review is more useful than clicking with no feedback.
For a broader look at how question and clip formats differ across practice materials, this guide to DMV practice tests walks through the formats.
How to Pass Hazard Perception Test Sections Without Over-Clicking
Learning how to pass hazard perception test sections comes down to timing and restraint.
A simple rule: click once when the situation changes, and once more if it changes again. A parked car is not a hazard.
Test-day nerves can push people toward over-clicking. Our walkthrough on how to pass the driving test puts hazard perception in the wider context of test day.
Building Observation Skills Between Practice Sessions
Observation skills grow between drives, not just during them. Short, low-pressure exercises keep the habit alive without adding stress.
- Passenger scanning: on any car trip, spot developing hazards from the passenger seat and say them aloud.
- Parked review: sit safely parked and watch a junction for five minutes, predicting which cars will pull out.
- Walk-and-name: on a walk, name one potential hazard per block.
Parents and coaches get more from these sessions with a calm, structured approach. Our guide on how to coach a nervous learner driver covers one clear goal, early directions, and a calm review while parked.
Start Your Guided Hazard Perception Practice
Hazard perception tends to improve with structure. You can try your first LearnerMiles interactive driving lesson free, practicing vehicle checks, gentle starts and stops, then completing a coach-led progress record.
LearnerMiles offers a Calm-Car Agreement for setting expectations between learner and coach, ten progressive lessons with pre-drive checks, and a digital practice log for tracking what you worked on and what to try next, plus confidence and readiness reflection tools. If you want to extend the habit between drives, the LearnerMiles books and printables are available, and the LearnerMiles guided practice membership pairs guided lessons with the digital practice log. Rules and licensing requirements vary by jurisdiction, so always confirm details with your local licensing authority.
Ready to make practice sessions calmer and more purposeful? Start with the free First Drive Kit at LearnerMiles and try a guided lesson with the digital practice log. Explore guided lessons and the practice log at learnermiles.com.
Frequently Asked Questions
What is the best way to practice hazard perception for a driving test?
Build a repeatable routine instead of watching clips passively. Before each session, review a few hazard perception examples and name what makes each one develop. During supervised drives, narrate potential hazards out loud as you scan. Afterward, review any practice clips and write down why each click landed early, late, or not at all. Rules and test formats vary by jurisdiction, so confirm the exact format with your local licensing authority before test day.
What is the three-click trick, and does it help with hazard perception?
The three-click trick is a habit of clicking several times as a hazard develops, hoping one click lands inside the scoring window. It can backfire: many scoring systems penalize constant clicking, and in real driving it pulls attention from the road. A better approach is to click once when you first notice a potential hazard and again if it clearly develops. Practice recognizing developing hazards rather than guessing at timing.
How do I practice hazard perception with a parent or driving coach?
Agree on roles before you start. The learner drives and narrates hazards out loud; the coach stays quiet except for safety calls and notes what was missed. Use a simple pre-drive check, then review three or four moments after the session and ask what signaled each hazard. A shared practice log keeps sessions consistent and shows progress over weeks, which matters more than any single drive.
How can nervous or returning drivers build hazard awareness?
Start with short, low-traffic routes and focus on one scanning habit at a time, such as checking intersections or watching for brake lights ahead. Review footage or notes after each drive to spot what you noticed and what you missed. If anxiety interferes with concentration or daily life, stop driving safely when you can and speak with a qualified health professional. Confidence grows from repeated, structured practice, not from rushing into busy roads.
