
Table of Contents
- Why Structured Driving Practice Drills Matter
- Drill 1: The Cockpit Drill and Vehicle Setup
- Drill 2: Smooth Acceleration and Braking Control
- Drill 3: Steering Techniques and Lane Discipline
- Drill 4: Mirror Checks and Blind Spot Awareness
- Drill 5: Signaling and Right-of-Way Communication
- Drill 6: Turning Maneuvers and Intersection Safety
- Drill 7: Parallel and Reverse Parking Techniques
- Frequently Asked Questions
Last Updated: September 28, 2026
Why Structured Driving Practice Drills Matter
Learning to drive feels overwhelming. You know you need practice hours, but where do you start? What should you focus on? How do you know if you're actually improving?
Drill 1: The Cockpit Drill and Vehicle Setup
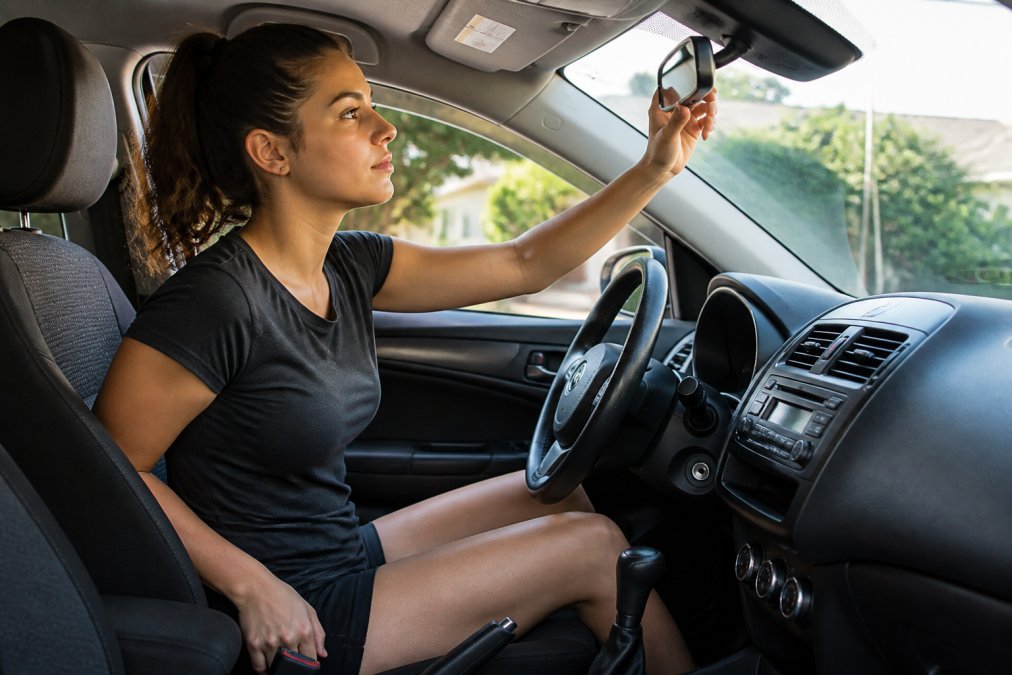
Before you even start the engine, master the cockpit drill. This is your foundation. A properly adjusted vehicle prevents bad habits and keeps you safe.
-
Seat position, Sit close enough that your legs have a slight bend when pressing the pedals. Your arms should reach the steering wheel with a slight bend at the elbows.
-
Mirror adjustment, Set your rearview mirror so you see the entire rear window. Adjust side mirrors so you see a thin sliver of your car's body on the inside edge, with the road taking up most of the view. This minimizes blind spots.
-
Steering wheel height, Position it so you can see the instrument cluster and hold it comfortably. It should point toward your chest, not your face.
-
Seatbelt, Fasten it every single time. The belt should cross your shoulder and lap, not your neck or stomach.
-
Pedal familiarity, Press each pedal gently to feel where it sits. Know the distance between gas and brake. This prevents panic mistakes.
Drill 2: Smooth Acceleration and Braking Control
Jerky acceleration and hard braking scare passengers and waste fuel. Smooth control is a skill you build through repetition.
Acceleration drill:
- Start from a stop
- Press the gas pedal slowly and steadily
- Reach 20 mph over 10 seconds
- Hold 20 mph for 30 seconds
- Gradually ease off the gas and coast to a stop
Braking drill:
- Accelerate gently to 20 mph
- Ease off the gas
- Press the brake pedal slowly and evenly
- Come to a complete stop over 10 seconds
- Repeat five times
Drill 3: Steering Techniques and Lane Discipline
Steering control determines how safely you navigate curves, lane changes, and tight spaces. Poor steering technique causes accidents.
How it works:
- Grip the wheel at 9 o'clock and 3 o'clock positions
- To turn left: push the wheel up with your left hand while pulling down with your right
- To turn right: push the wheel up with your right hand while pulling down with your left
- Don't cross your hands, this causes loss of control
Practice this in an empty lot:
- Drive in a straight line for 30 seconds. Keep the wheel centered.
- Make a gentle left turn using push-pull. Hold the turn for 10 seconds.
- Straighten out using the same technique.
- Repeat with right turns.
- Practice figure-eight patterns to combine left and right turns.
Drill 4: Mirror Checks and Blind Spot Awareness
You can't drive safely if you don't know what's around you. Mirror checks and blind spot awareness prevent collisions.
Mirror check routine:
- Check your rearview mirror every 5-10 seconds
- Check your side mirrors every 5-10 seconds
- Before changing lanes or turning, do a head check to see the blind spot
Blind spot drill:
- Have your coach sit in a passenger seat
- Drive at 25 mph on a quiet road
- Every 20 seconds, call out what you see in each mirror
- Your coach confirms if you're accurate
- Practice for 10 minutes
Drill 5: Signaling and Right-of-Way Communication
Signaling tells other drivers what you plan to do. It's not optional, it's the law. Right-of-way rules determine who goes first at intersections. But rules alone don't prepare you for the real world, where drivers don't always follow them, and situations are rarely textbook.
Signaling drill:
- Drive on a quiet road at 25 mph
- Practice turning on your signal 3-5 seconds before each turn
- Make the turn smoothly
- Turn off the signal after completing the turn
- Repeat with left and right turns
Right-of-way basics:
- At a four-way stop, the first car to stop has the right to go first
- If two cars stop at the same time, the car on the right goes first
- When turning left, yield to oncoming traffic
- Pedestrians always have the right of way in crosswalks
- At a yield sign, you must let other traffic pass before entering
Right-of-way decision drill:
-
Scenario: Two cars arrive at a four-way stop at nearly the same time. Your car is on the left; the other is on the right.
- Your decision: Yield. The car on the right goes first.
- Why this matters: Many new drivers hesitate or assume the other driver will yield. They won't. Know the rule and act on it.
-
Scenario: You're turning left at a green light. An oncoming car is also turning left into the same intersection.
- Your decision: Yield to oncoming traffic. They have the right of way.
- Common mistake: Assuming the other driver will turn first because they're closer. Don't assume. Wait until the road is clear.
-
Scenario: You're at a red light with a right-turn-on-red sign. A pedestrian is in the crosswalk.
- Your decision: Wait. Pedestrians always have the right of way, even if the sign allows you to turn.
- Why this matters: Right-turn-on-red is a privilege, not a guarantee. The pedestrian's safety comes first.
-
Scenario: You're on a residential street and a cyclist is approaching from your right at an unmarked intersection.
- Your decision: Treat the cyclist like a car. If they reach the intersection first or at the same time, they have the right of way.
- Common mistake: Assuming cyclists don't count. They do. They have the same rights and responsibilities as drivers.
Drill 6: Turning Maneuvers and Intersection Safety
Turns are where many new drivers struggle. Speed, angle, and timing all matter.
Left turn drill:
- Approach an intersection at 15 mph
- Signal 3-5 seconds before the turn
- Position your car in the left turn lane
- Wait for oncoming traffic to clear
- Turn smoothly, keeping your speed steady
- Complete the turn and straighten out
Right turn drill:
- Approach the intersection at 15 mph
- Signal 3-5 seconds before the turn
- Slow down as you approach
- Check for pedestrians in the crosswalk
- Turn smoothly
- Straighten out and accelerate gently
Intersection safety checklist:
- Scan for pedestrians and cyclists
- Check all directions before entering
- Don't turn on red unless the sign allows it
- Yield to pedestrians in crosswalks
- Never block the intersection while waiting to turn
Drill 7: Parallel and Reverse Parking Techniques
Parallel parking intimidates many new drivers. It's a skill, not a talent. Practice makes it automatic.
Parallel parking steps:
- Find a space at least 1.5 times your car's length
- Pull alongside the front car, about 2 feet away
- Reverse while turning the wheel fully right
- When your car is at a 45-degree angle, straighten the wheel
- Continue reversing until your car is mostly in the space
- Turn the wheel fully left and pull forward to center yourself
- Adjust as needed
Reverse parking (perpendicular):
- Approach the space slowly
- Position your car at a 45-degree angle to the space
- Reverse while turning the wheel fully toward the space
- When your car is halfway in, straighten the wheel
- Continue reversing until you're fully in the space
- Adjust to center yourself
Frequently Asked Questions
What are the most important driving practice drills for new drivers?
The foundational drills focus on vehicle control, spatial awareness, and hazard perception. Cockpit setup, smooth acceleration and braking, steering control, mirror checks, signaling, turning maneuvers, and parking techniques form the core of safe driving practice. Defensive driving and hazard perception drills help learner drivers anticipate risks. Practicing these in sequence, starting with quiet streets and progressing to busier roads, builds competence and confidence before road tests.
How can I help track my teenager's supervised driving hours?
A digital practice log removes guesswork from tracking. Record the date, time, location, conditions (weather, traffic), and skills practiced in each session. Note specific drills completed and any challenges encountered. This creates accountability and helps identify patterns, whether your teen needs more work on parallel parking or defensive driving in rain. A structured log also documents progress for your local licensing authority, which may require proof of supervised hours.
What driving anxiety tips actually help new drivers feel calmer?
Anxiety often stems from uncertainty about what to practice and how to improve. Break practice into small, manageable drills rather than long, unstructured drives. Set clear expectations before each session using a parent-teen driving agreement. Practice the same drill repeatedly in safe environments before moving to busier roads. Celebrate small wins and focus on skill mastery, not perfection. Breathing techniques and positive self-talk during practice also reduce stress and improve focus on the road.
How many practice hours do new drivers typically need before a road test?
Requirements vary by state and licensing authority. Most jurisdictions recommend 40-60 hours of supervised driving, with a portion in varied conditions (night, rain, highway). However, the quality of practice matters more than hours alone. Structured drills targeting specific skills, steering control, parking, hazard perception, build competence faster than casual driving. Check your local DMV or licensing authority for your state's specific minimum hours and any restrictions on when supervised practice can occur.
Knowing what to practice is half the battle. The other half is tracking your progress and building confidence over time. LearnerMiles combines these 10 drills with a digital practice log, coach-learner communication tools, and guided lessons so you can see exactly how far you've come. Explore the platform and the progressive lesson structure at learnermiles.com to turn practice hours into real skill development.